Boundary file formats accepted include the PCTv, Agworld KML and Shapefile, SST Shapefiles as .sst, Farmworks Shapefiles, SMS Shapefiles, and John Deere Shapefiles.
Field boundaries can also be imported from Agworld and John Deere Operations Center™.
Add Grower/Farm/Field from Shapefile
If you have a shapefile that has the information needed to create the Grower/Farm/Field tree, then follow the steps below.
Steps:
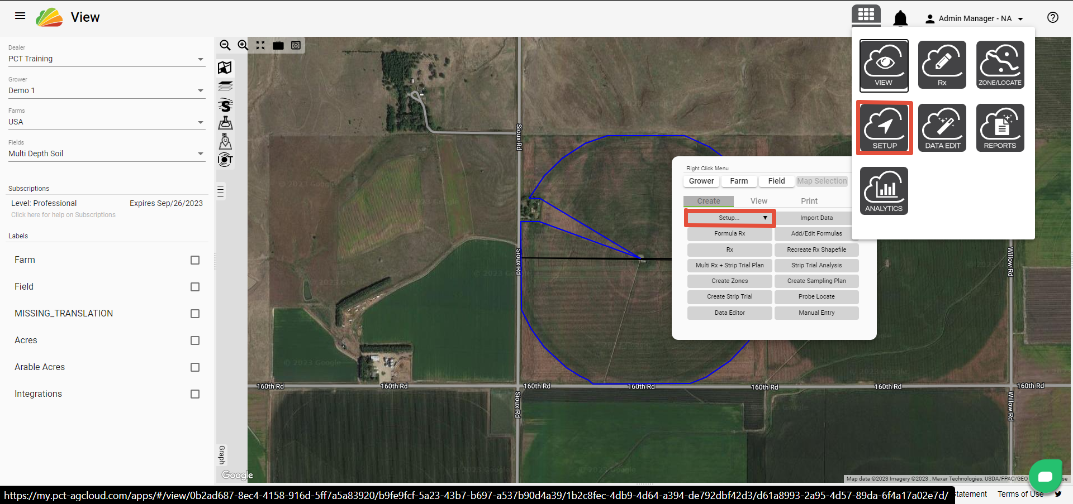
1. To access the Setup tool from View, click the 'Tools' button and select 'Setup' or select the 'Setup' dropdown and click 'Go to Setup...'

2. Select the 'Field Editor' dropdown and click 'Import from Shapes'.

-Note: The connection for the integration with Agworld and Operations Center™ can also be found here. Click for Operations Center™ or Agworld.
3. Once the dialogue box opens, search for the files or drag them into the box.
4. Click 'Import'.
-Note: zipped files will upload, and multiple files can be loaded at one time.

Add Grower/Farm
To manually add a Grower, follow the steps below. To add a Farm, follow the same steps but select the 'Farm Editor' dropdown.
Steps:
1. In the Setup tool, click the 'Grower Editor' dropdown.
2. Click the 'Add new grower' button represented by the plus sign.

3. Type the name of the new grower and click 'Add Grower'.

Add Fields
To add a Field you have to first add the name of the field and then add a polygon. For instructions on this process, follow the steps below.
Steps:
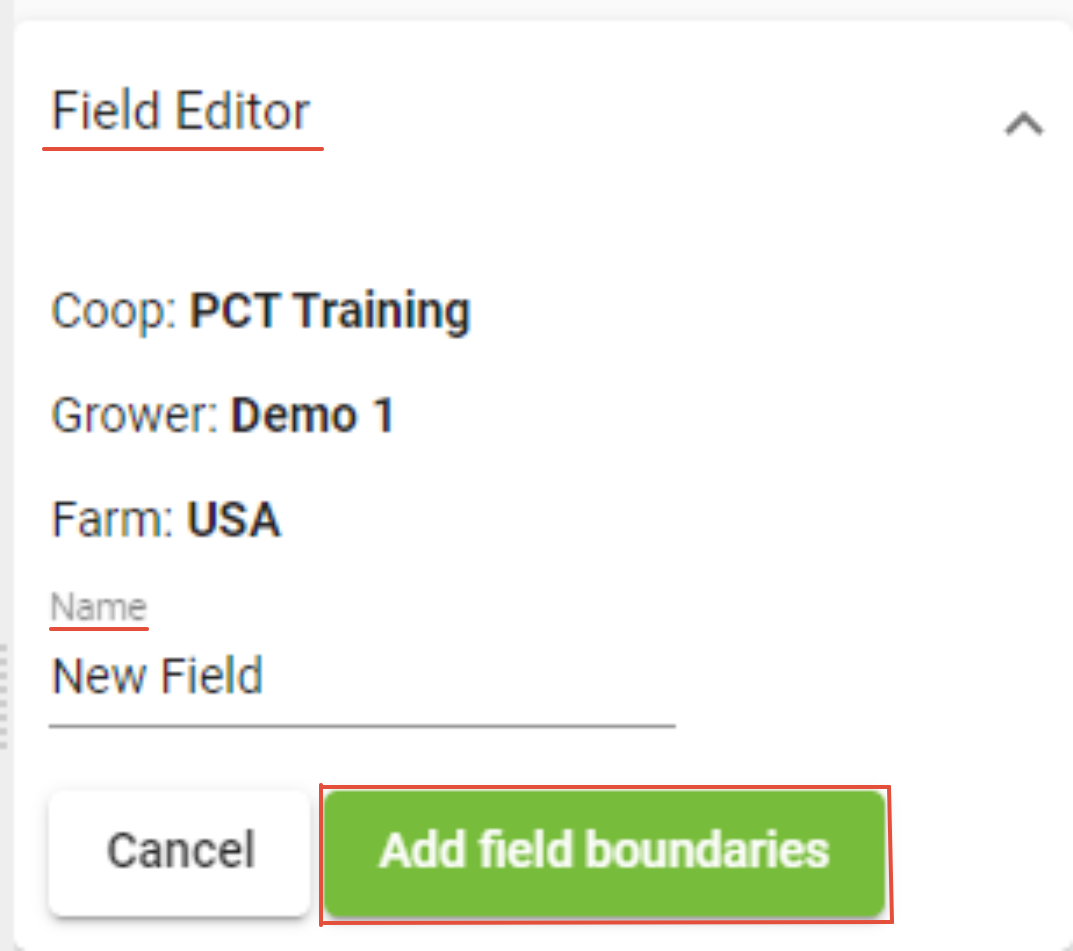
1. Click on the 'Field Editor' dropdown and select the 'Add new Field' button represented by the plus sign.

2. Type the name of the field.
-Note: Try to avoid special characters in names.
3. After the field name has been entered, click 'Add field boundaries'.

4. Click 'Add external/internal boundaries' to draw the field boundary polygon.
5. Click in the map view to add points, and double-click to complete the polygon.

6. To add a circle boundary, click 'Add pivot circle'.
7. Click and drag to move the center point, or type in the coordinates.
8. Adjust the length of the radius to shrink or swell the circle.
9. Click 'OK' when finished.

After the boundary has been created, there are a number of options including:
- Adding the amount of the field that is owned, rented or sharefarmed.
- Adding internal boundaries.
- Setting an internal boundary as passable or impassible (default is impassible).
- Setting the field or polygons as irrigated or non-irrigated (default is non-irrigated).
10. When finished, click 'Save

Was this article helpful?
That’s Great!
Thank you for your feedback
Sorry! We couldn't be helpful
Thank you for your feedback
Feedback sent
We appreciate your effort and will try to fix the article