Follow the steps in the video or article below to create Grid Sample Plans.
Create New Plan from Scratch:
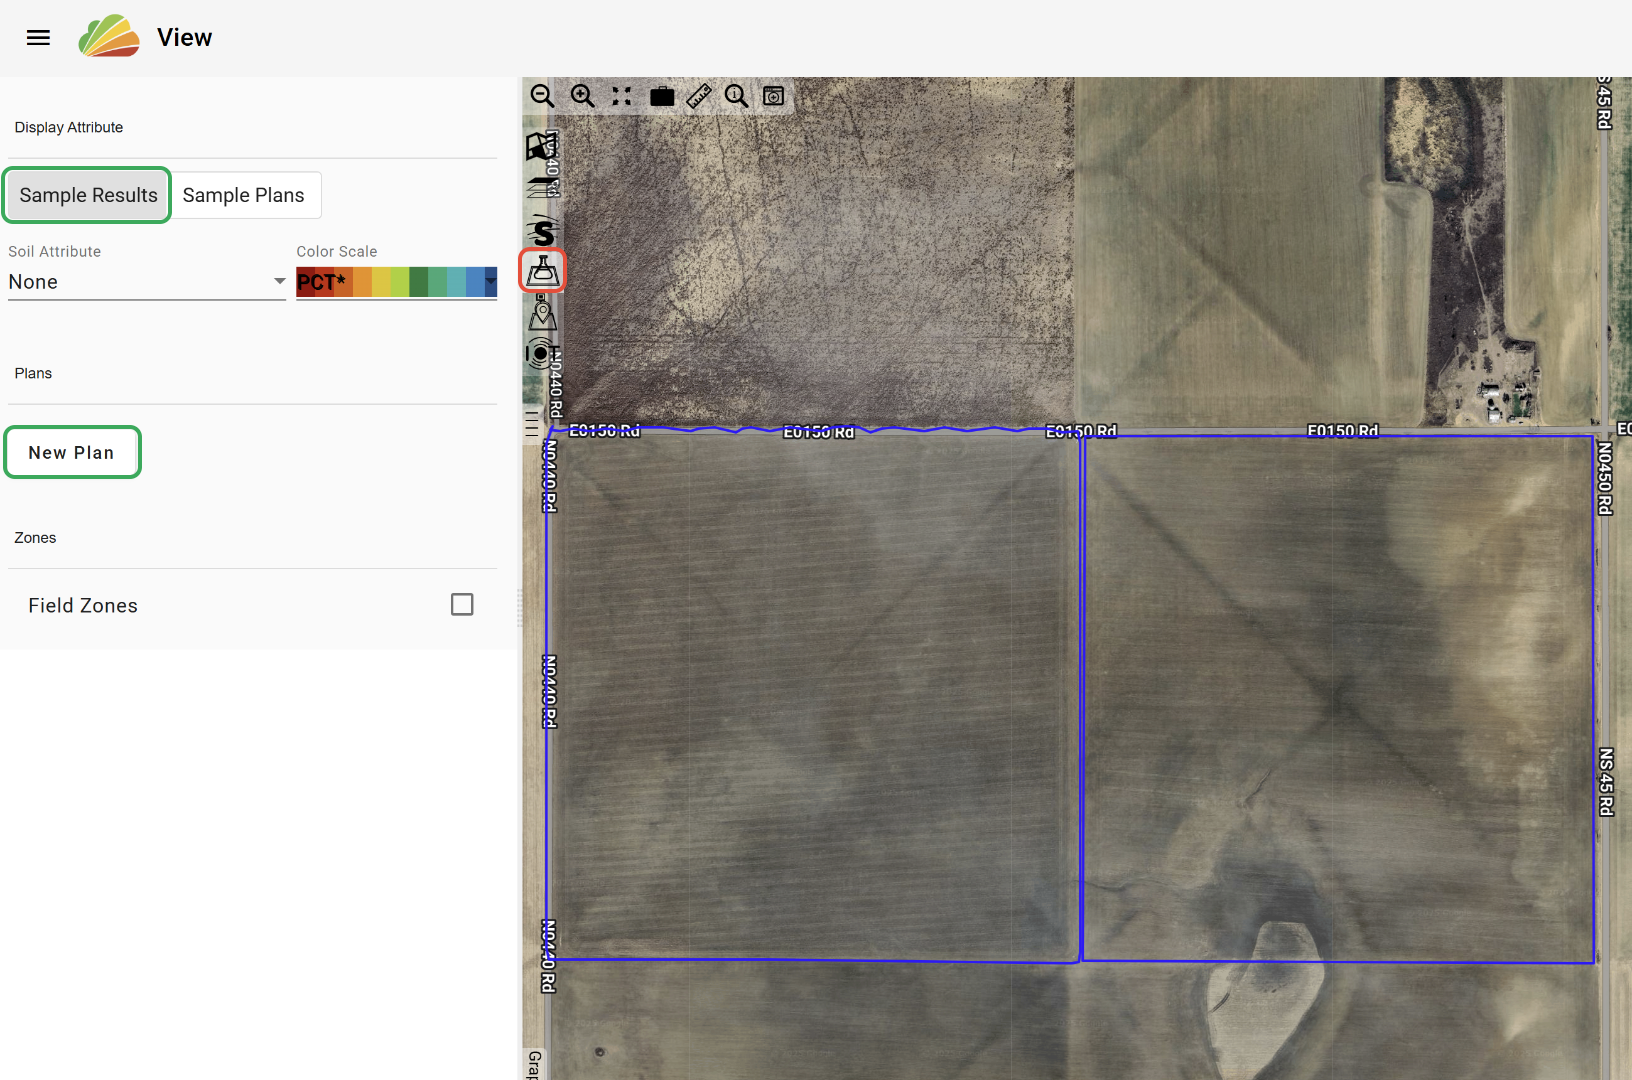
1. In the View tool, with the desired field or fields selected, open the 'Soil Data' tab.
2. Under the 'Sample Results' tab, click 'New Plan'.
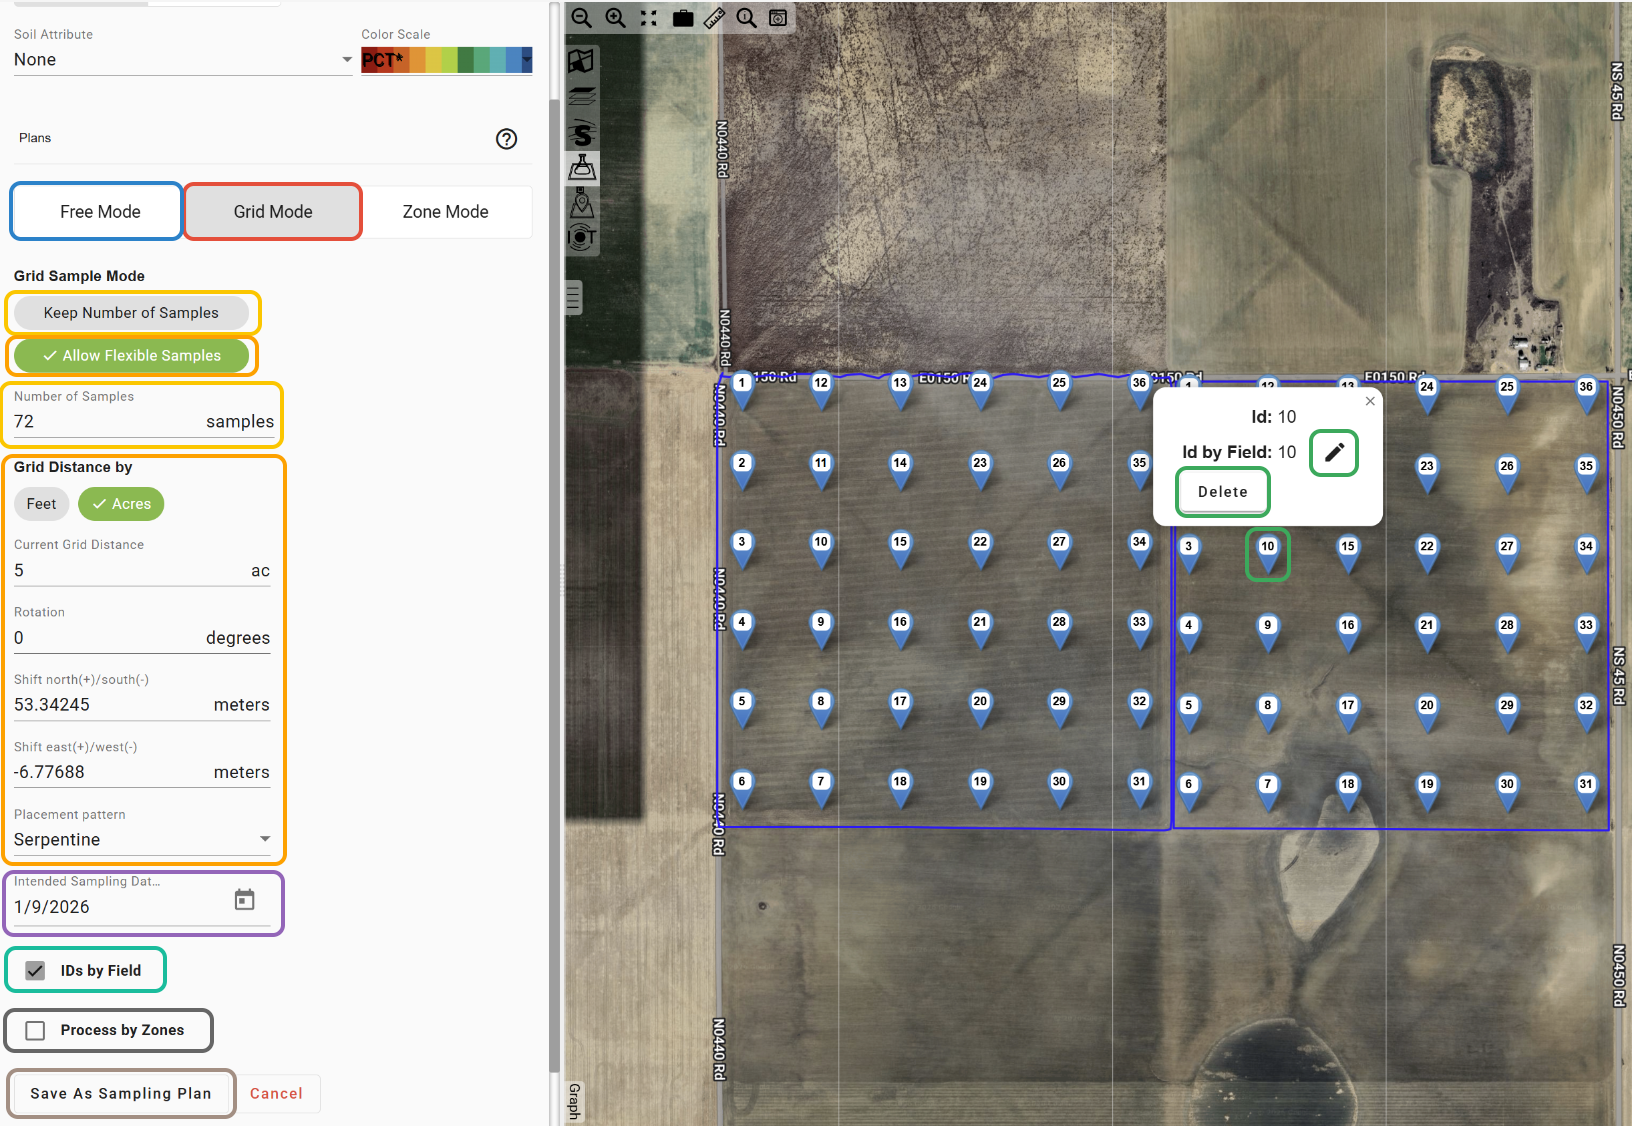
3. Click the 'Grid Mode' tab. This will automatically place points in a grid that best fits the selected field boundary.
4. Adjust the whole grid by clicking and dragging on a point, delete points by selecting the point and clicking 'Delete', and edit point IDs by selecting the point and clicking the 'Edit' button.
5. To adjust individual points or to add new points, select the 'Free Mode' tab. With 'Free Mode' activated, click and drag a point to adjust its location independently of the whole grid. To add a new point, click in the field boundary.
6. To keep the number of samples the same across fields, select the 'Keep Number of Samples' option and enter the number of samples in the line.
7. To plan the grid based on a set distance in acres or feet, select the 'Allow Flexible Samples' option and set the grid parameters in the lines.
8. If you are creating plans for multiple fields at a time, check the 'IDs by Field' box to reset the ID numbering for each field boundary.
9. Check the 'Process by Zones' box if there are active Zone Boundaries for the field(s) that you would like the results to process by.
10. Set the Intended Sampling Date (this is the date that the plan will be saved under).
11. Click 'Save as Sampling Plan'.
Create from Existing Points:
If existing Sample IDs are saved for the field, either from imported points or a previous Sample Plan, they can be used to create a new plan.
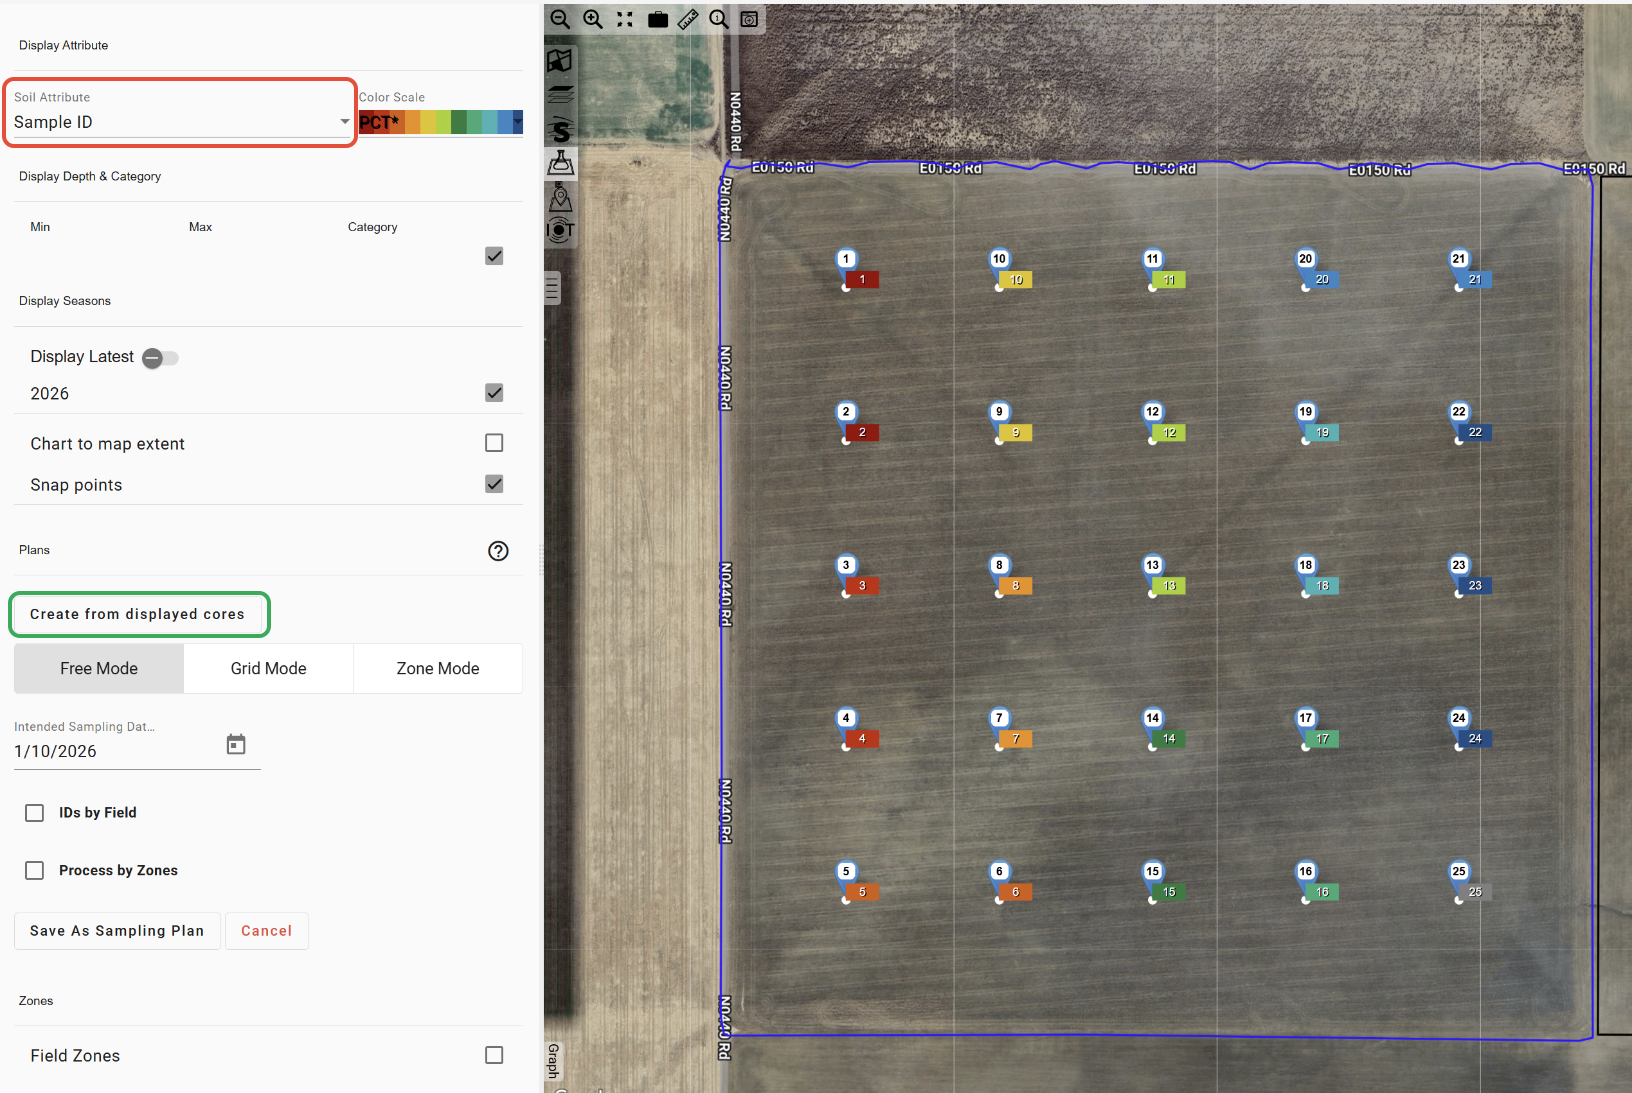
Select 'Sample ID' under the 'Soil Attribute' dropdown.
Click the 'Create from displayed cores' button.
Then adjust and save the plan as normal.
Was this article helpful?
That’s Great!
Thank you for your feedback
Sorry! We couldn't be helpful
Thank you for your feedback
Feedback sent
We appreciate your effort and will try to fix the article