Follow the steps in the video or article below to create Zone Sample Plans.
To create Zone Sample Plans, saved Zone Boundaries are required for the selected field(s). Zone Boundaries are distinct from Zone Layers. To learn about how to create and manage Zone Boundaries, click HERE.
Create New Plan from Scratch:
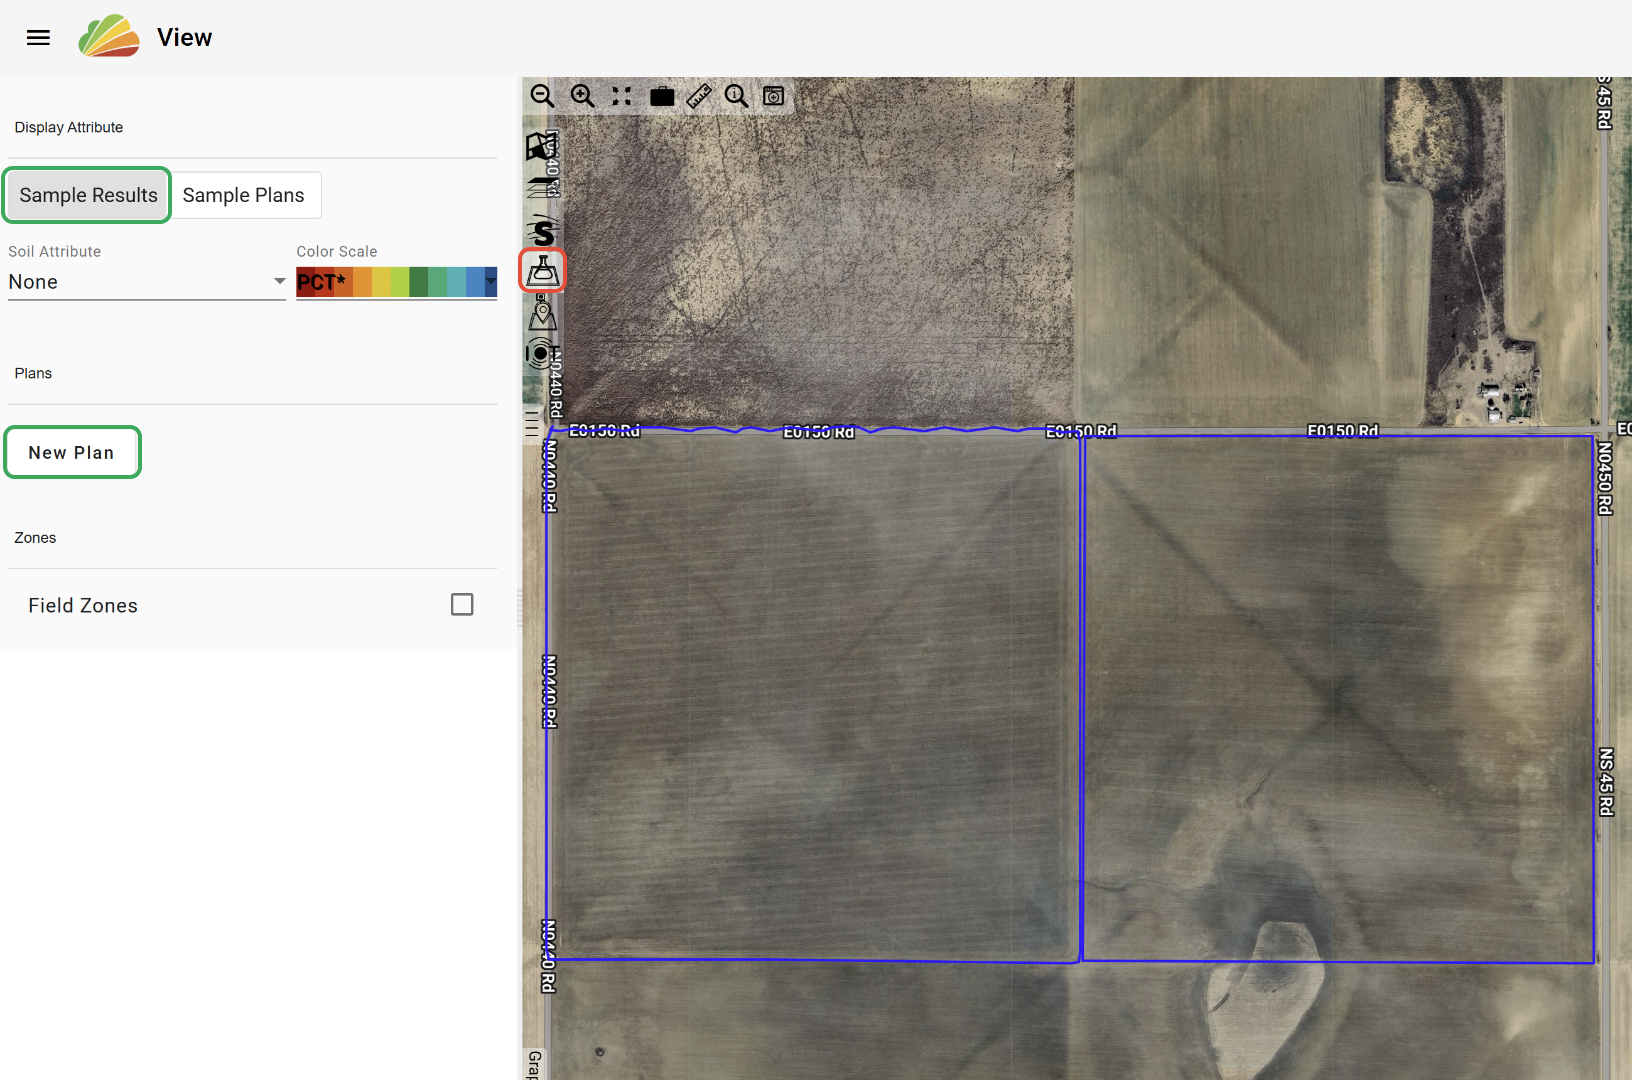
1. In the View tool, with the desired field or fields selected, open the 'Soil Data' tab.
2. Under the 'Sample Results' tab, click 'New Plan'.

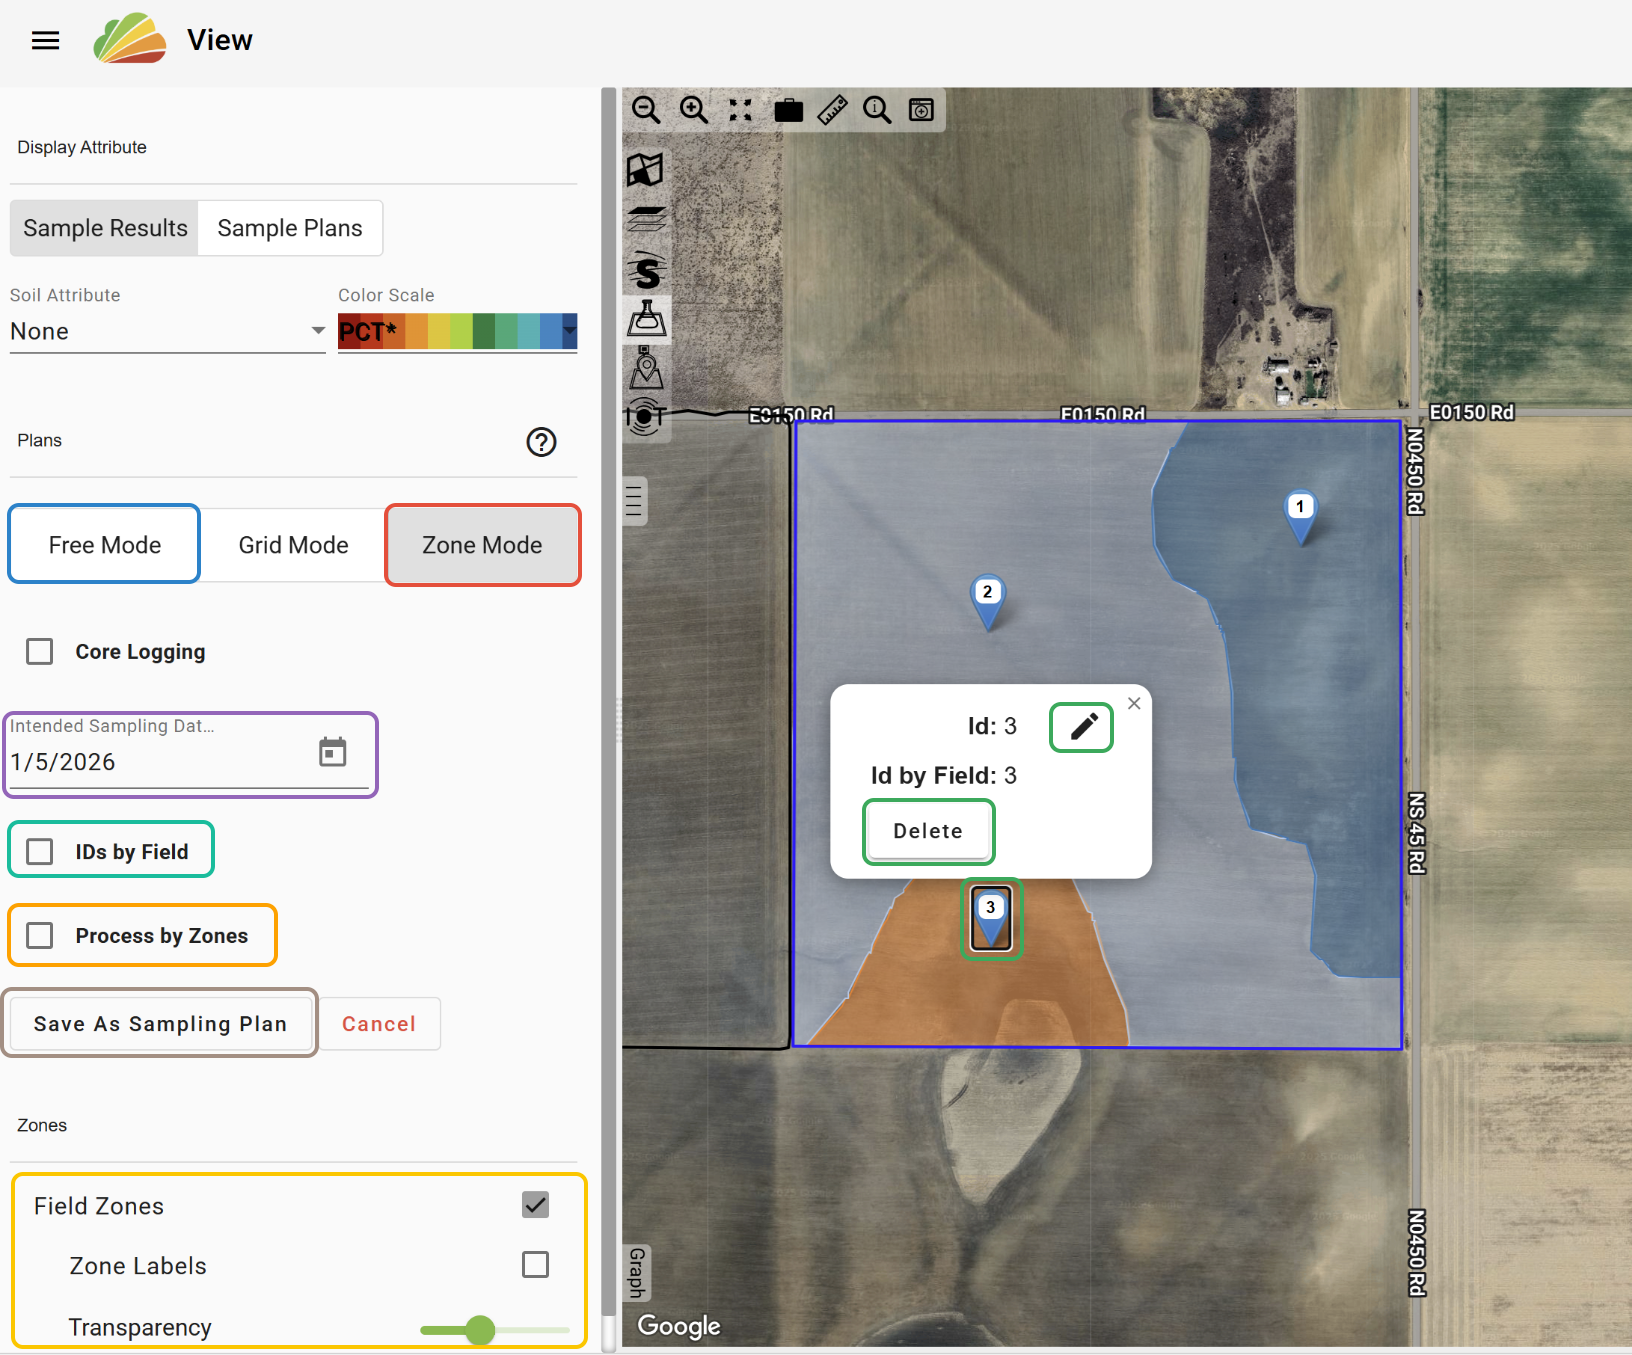
3. Click the 'Zone Mode' tab. This will automatically plot one sample point in the middle of the largest polygon of each Zone.
4. Adjust the point locations by clicking and dragging, delete points by selecting the point and clicking 'Delete', and edit point IDs by selecting the point and clicking the 'Edit' button.
5. Add new points by selecting the 'Free Mode' tab and clicking in the map where you would like to add the new point(s).
6. Check the 'Field Zones' box to view the Zone Boundaries. Zone Labels can be displayed, and the transparency of the Zones can be adjusted.
7. Check the 'Process by Zones' box to ensure that when the data is sent back from the lab, it will be surfaced to the Zone Boundaries.
8. If you are creating plans for multiple fields at a time, check the 'IDs by Field' box to reset the ID numbering for each field.
-Note: The 'Core Logging' option gives you the ability to create Composite Zone Plans. Click HERE to learn more about Composite Plans.
9. Set the Intended Sampling Date (this is the date that the plan will be saved under).
10. Click 'Save as Sampling Plan'.
Create from Existing Points:
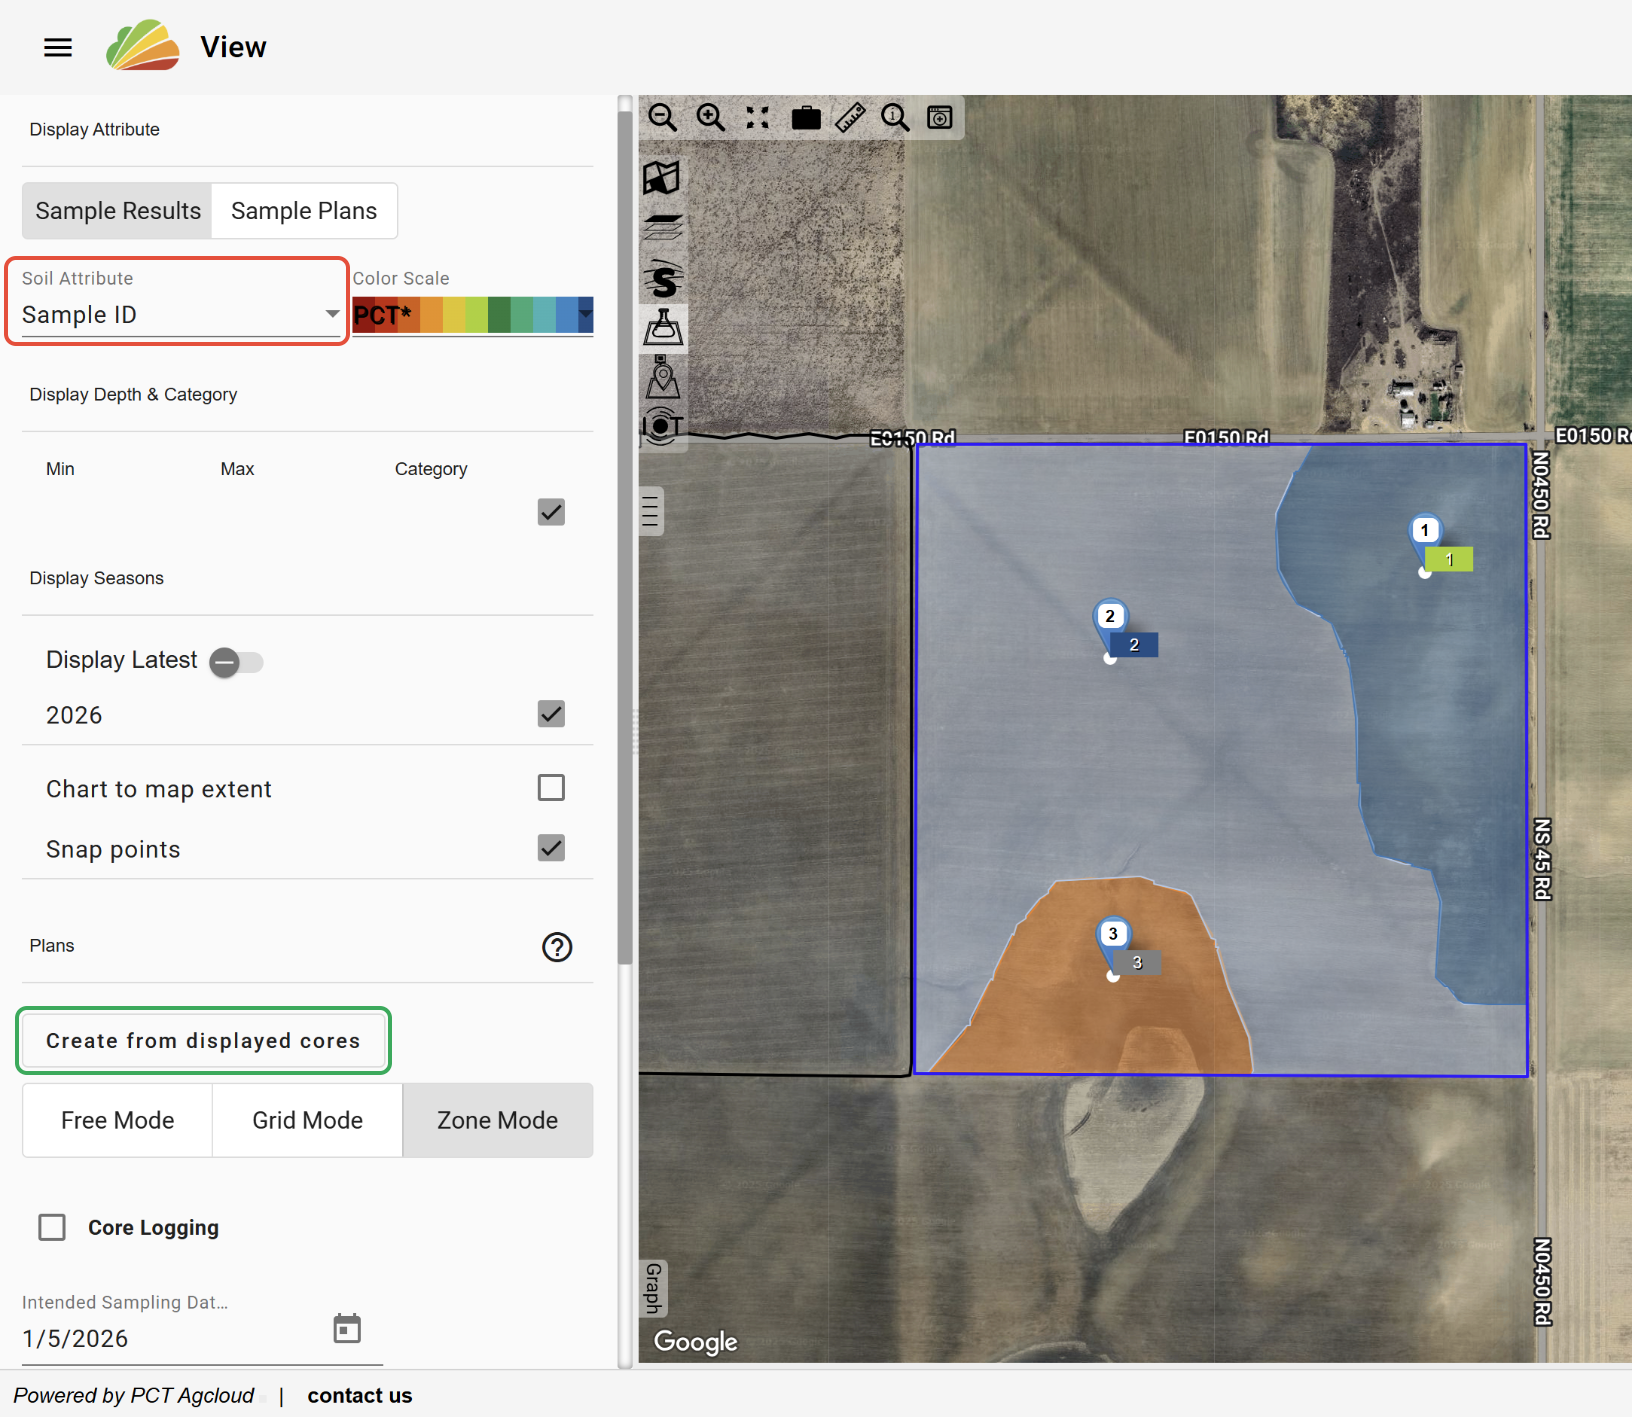
If existing Sample IDs are saved for the field, either from imported points or a previous Sample Plan, they can be used to create a new plan.
Select 'Sample ID' under the 'Soil Attribute' dropdown.
Click the 'Create from displayed cores' button.
Then adjust and save the plan as normal.

Was this article helpful?
That’s Great!
Thank you for your feedback
Sorry! We couldn't be helpful
Thank you for your feedback
Feedback sent
We appreciate your effort and will try to fix the article