In the sample planner within PCT Agcloud, you now have the option to plan individual core sites to create a composite sample plan. Whole field or zone composite plans can be created; however, Zone Boundaries are required for both. See the steps in the video or article below on how to do this.
Steps:
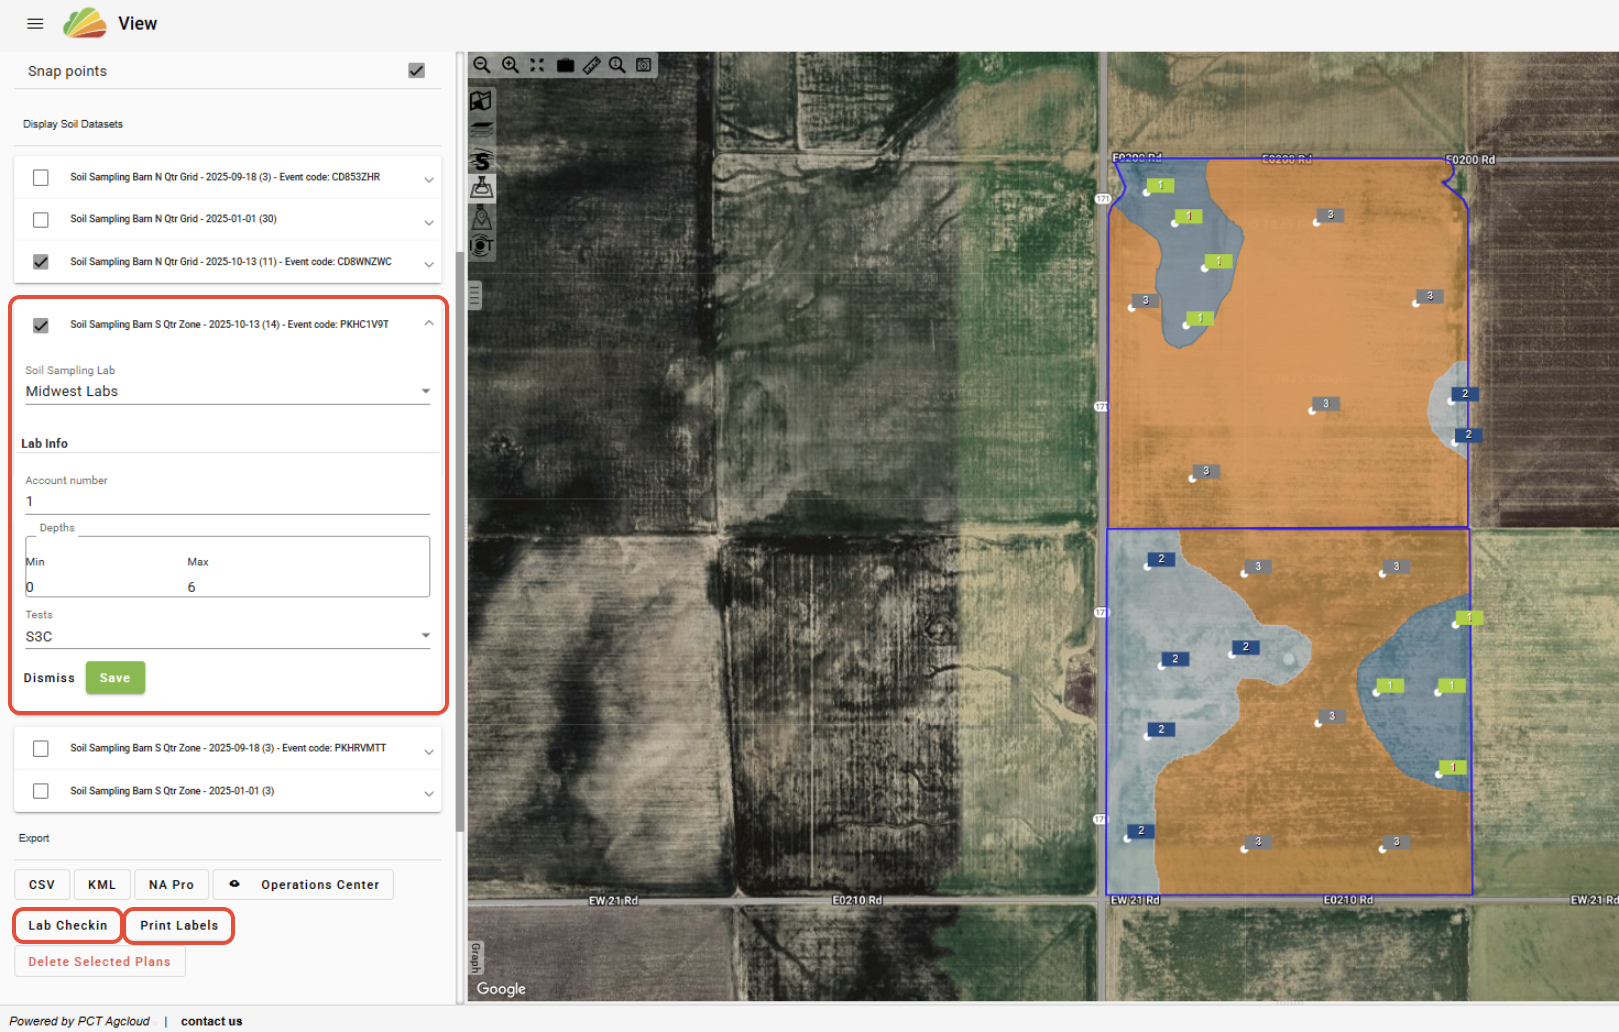
1. In the View tool, with the desired field(s) selected, open the 'Soil Data' tab.
2. Click the 'Zone Mode' option.
-Note: The selected fields must have active zone boundaries. Click HERE to learn how to create and manage zone boundaries.
3. Check the 'Core Logging' box.
4. Enter the number of 'Samples per Zone' in the line, then click outside of the line to apply. This should function as the maximum number of cores per zone. Core locations can only be deleted and not added in this option.
5. Choose the 'Keep Same ID' option to number all core sites within a zone the same. Choose the 'Allow Flexible ID' to number the sites sequentially.
6. Adjust the location of the core sites by clicking and dragging the pin, and delete any sites if necessary by clicking on the pin and selecting 'Delete'.

7. Check the 'Process by Zones' box.
8. Click 'Save as Sampling Plan'.

9. Under the 'Sample Plans' tab, the plans can be viewed, labs can be selected, checkin sheets can be downloaded, and labels can be printed.
-Note: Bag labels and checkin sheets will only list one ID number per zone.
Was this article helpful?
That’s Great!
Thank you for your feedback
Sorry! We couldn't be helpful
Thank you for your feedback
Feedback sent
We appreciate your effort and will try to fix the article